Introduction
Self-hosting your deployments gives you full control and flexibility over your infrastructure. In this step-by-step guide, we'll walk through the process of setting up Coolify on Hetzner VPS to self-host your projects, with a focus on AI applications.
We'll also explore the benefits of self-hosting compared to using platforms like Vercel.
Step 1: Getting Two VPS from Hetzner
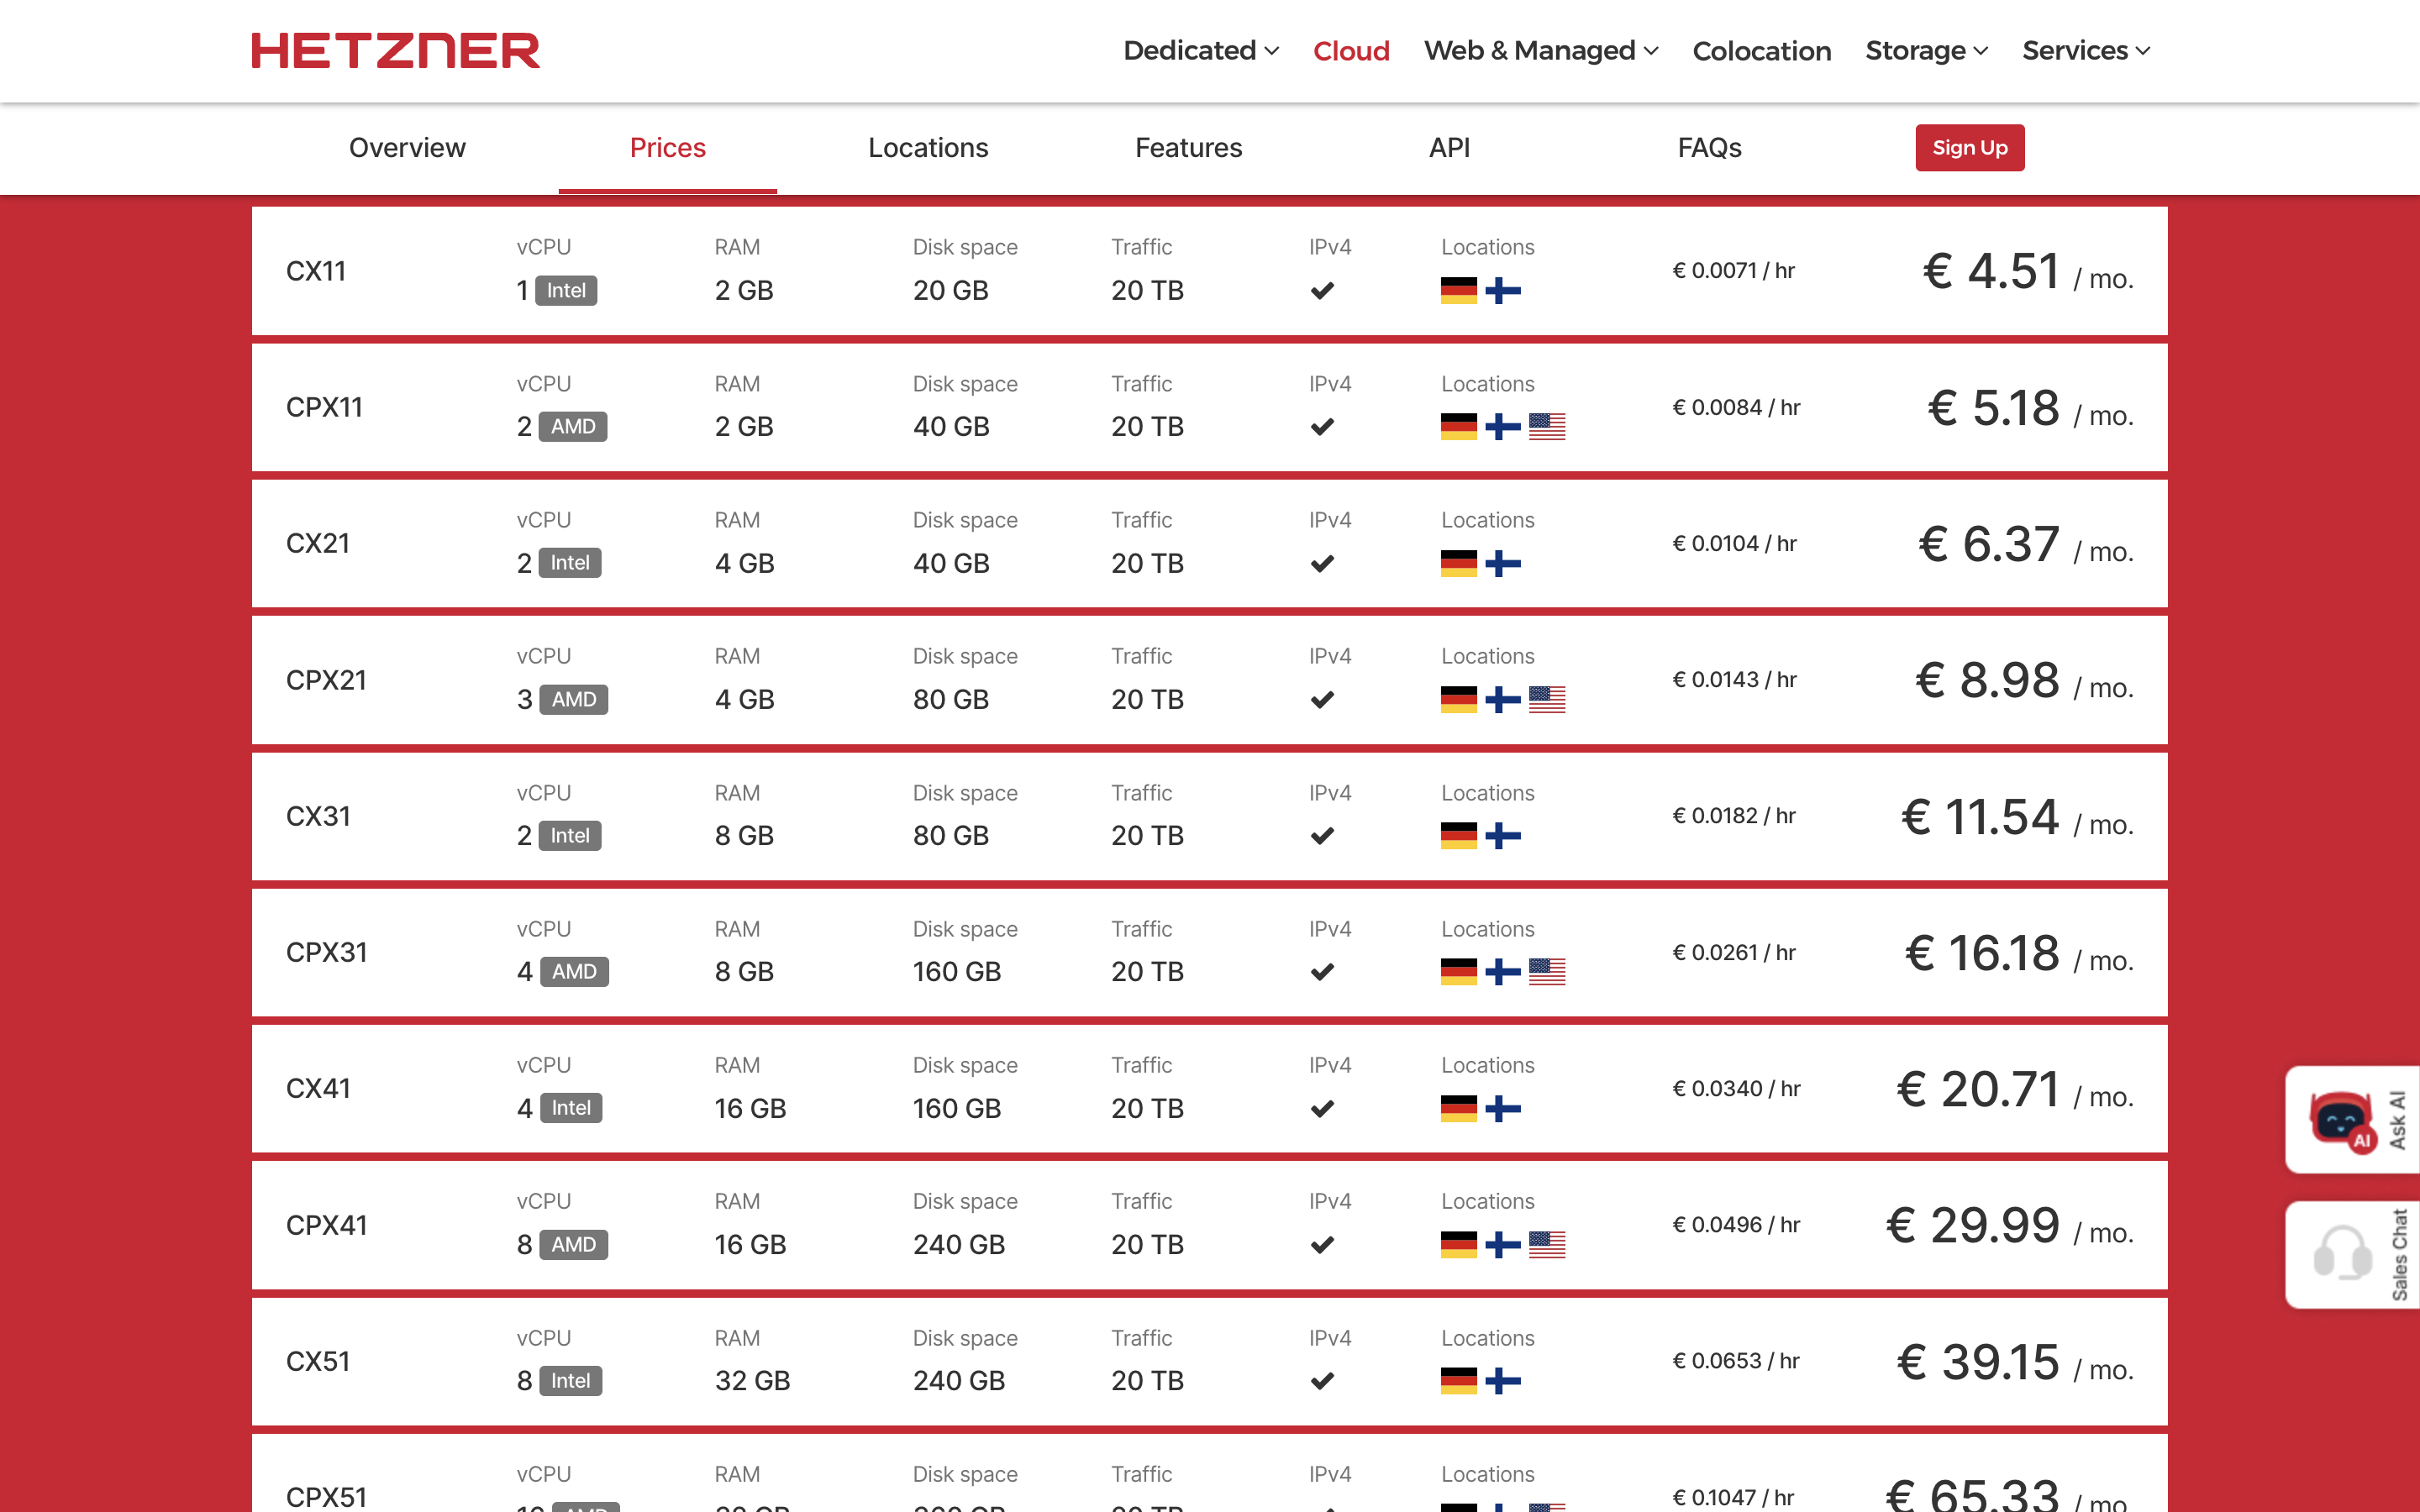
Consider the resource needs of your projects when selecting the Deployment VPS plan. You can always scale up later if needed.
To get started, you'll need to set up two VPS (Virtual Private Servers) from Hetzner:
-
Coolify VPS: Choose the smallest VPS plan available to host Coolify itself. This VPS will manage your deployments and act as the control plane.
-
Deployment VPS: Select a larger VPS plan to host your actual deployments and projects. The size of this VPS will depend on the requirements of your applications.
Personally, I use the CAX11 for Coolify and the CAX31 for my personal projects:

Step 2: Setting up Coolify on your Hetzner VPS
Installing Coolify is actually quite easy to do. You simply run one command, and it will auto-install everything you need for you. Please check out the official documentation so you're always up to date.
After the auto-installer is complete, you'll be able to access the Coolify web interface by opening a browser and navigating to http://<your-coolify-vps-ip>:8000.

Step 3: Linking Your Deployment VPS to Coolify
With Coolify set up, let's link your larger Deployment VPS to Coolify:
- In the Coolify web interface, navigate to the "Servers" section.
- Click on "Add Server" and provide the necessary details for your Deployment VPS, such as its IP address, SSH credentials, and a name for identification.
- Coolify will establish a connection to your Deployment VPS and display its status.

Ensure that your Deployment VPS has Docker installed and the necessary ports open for communication with Coolify. Also make sure it has the required SSH key.
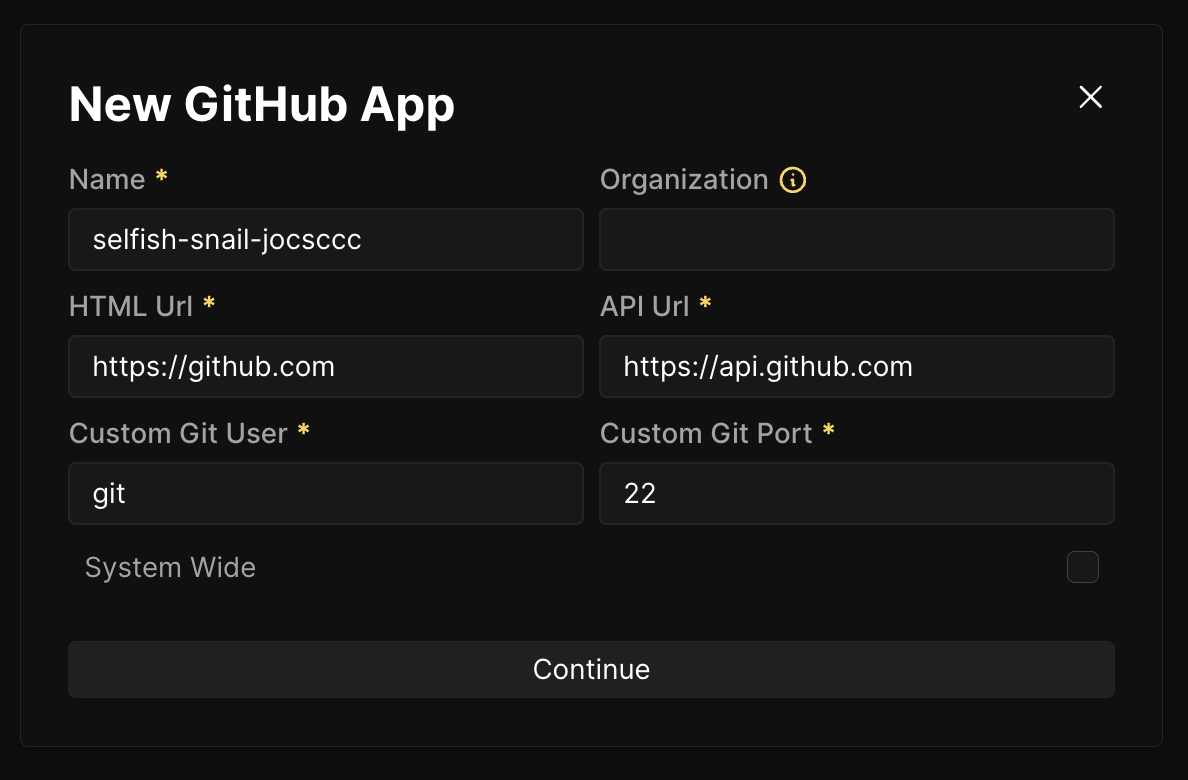
Step 4: Set up GitHub App to enable Automatic Deployments
To enable automatic deployments triggered by commits to your GitHub repositories, you need to set up a GitHub App:
- In the Coolify web interface, navigate to the "Sources" section.
- Click on "Add" and then "GitHub App".
- Follow the provided instructions to create a new GitHub App and grant Coolify access to your desired repositories.
- Once the GitHub App is set up, Coolify will automatically detect commits to your linked repositories and trigger deployments accordingly.
You can customize the deployment settings for each repository, such as the branch to deploy from and the build commands to run.
Benefits of Self-Hosting with Coolify
Self-hosting your deployments with Coolify offers several advantages compared to using platforms like Vercel, especially for AI projects:
- No Timeout Limitations: With Coolify, you have control over your infrastructure, eliminating the strict timeout limitations imposed by platforms like Vercel. This is particularly beneficial for AI applications that require longer processing times.
- Customizable Infrastructure: Self-hosting allows you to tailor your infrastructure to the specific needs of your AI projects. You can choose the appropriate resources, libraries, and configurations to optimize performance.
- Cost-Effective: By self-hosting, you can significantly reduce hosting costs compared to using managed platforms. You have the flexibility to select cost-effective VPS plans and scale resources based on your application's requirements.
- Full Control and Flexibility: Self-hosting with Coolify gives you complete control over your deployment pipeline. You can customize build processes, set up custom domains, and integrate with your preferred tools and services.
Self-hosting with Coolify empowers you to build and deploy AI applications without the limitations and costs associated with managed platforms.
Conclusion
In this step-by-step guide, we explored how to set up Coolify on Hetzner VPS to self-host your deployments. By following these steps and leveraging the benefits of self-hosting, you can take control of your infrastructure and build powerful AI applications without the constraints of managed platforms. Embrace the flexibility and freedom of self-hosting with Coolify and unlock the full potential of your AI projects!